| View previous topic :: View next topic |
| Author |
Message |
MasterInuYasha
Trick Member


Joined: 09 Nov 2006
Location: Columbus, Montana |
5660.  Posted: Wed Jan 31, 2007 10:21 pm Post subject: Posted: Wed Jan 31, 2007 10:21 pm Post subject: |
 |
|
| riptide wrote: | | It's kind of one of the things I was thinking of... I just don't want too much flex to occur... because then it would feel less like the arcade pads |
Thus why I plan on using 3/8'' thick panels, and a little stiffer of rubber to give it that "Arcade" feel.. as well as repress the panels. |
|
| Back to top |
|
 |
riptide
Trick Member

Joined: 14 Aug 2002
|
5661.  Posted: Thu Feb 01, 2007 6:24 am Post subject: Posted: Thu Feb 01, 2007 6:24 am Post subject: |
 |
|
| pinkdeath wrote: | | And I'm trying to establish whether or not to use LEDs or if bulbs would be the good choice. Because bulbs have a lot shorter lifespan. But I'm not sure if LEDs will be able to light up the entire 11"x11" arrow. Because I don't want the LEDs to just show little red dots up through the arrow. |
I did some experimenting with the LEDs when I was working on lighting my pads. LEDs will work, but you need to use 2-4 depending on how bright you want it to be and you will need to use Ultra-brights. To even out the light, you'll want to face the LEDs downward and use a curved reflector underneath them (kinda like turning the pad into a car headlight). I used some plastic sheet (craft section of walmart -- look for stenciling plastic) wrapped in tin foil -- try to prevent the foil from wrinkling too much... might help to glue to the plastic rather than wrapping the plastic. You could also try some foil based wrapping paper or something like that. When I did it, it was actually kinda impressive how well it spread the light across the arrow panel.
I just checked out stoli's dance pad design and it doesn't look like there's any room under the arrow panels for lighting... Did you modify stoli's design?
_________________
|
|
| Back to top |
|
 |
devout
Trick Member

Joined: 15 Dec 2006
Location: the atl |
5662.  Posted: Thu Feb 01, 2007 10:58 am Post subject: Posted: Thu Feb 01, 2007 10:58 am Post subject: |
 |
|
| pinkdeath wrote: |
My plan is to make it so that when the panel pressed down, not only is the switch pressed, but also a light is activated.
...
ALSO... to accomplish the red light through the arrow, I was wondering what to print on. My dad was suggesting printing on transparency. |
In answer to your question, printing on regular printer paper should be fine... light goes through it pretty well. I think if you print on transparency TOO much of the light will go through and you wont see the printed design, just a bunch of red bulbs.
I just built a pad with black and white arrows that light up red... Heres how I did it: Buy some thick black paper from a craft store... thick enough that it will block all light. Then I cut an arrow design out of the paper. I layered plexiglass >> black arrow stencil >> bottom plexiglass. Underneath is a sheet of plain old white printer paper and then a red cold cathode light. So when the light is off it's black with a white arrow, and when you step on it the arrow lights up red.
You could put a colored lighting gel over the white paper so the arrow is red even when its not lit up, or just use red tissue paper or something. The idea is to make it semi-opaque so it diffuses the light and also so you cant see all the wiring and crap through the plexiglass.
I recommend cold cathode lights because they are large, bright, unbreakable, and dont use a lot of power. They cost $6 a pop though, so probably more expensive than other options.
oh ps, a lighting gel isnt as messy as it sounds, thats just what they call color-tinted transparent plastic sheets |
|
| Back to top |
|
 |
riptide
Trick Member

Joined: 14 Aug 2002
|
5663.  Posted: Thu Feb 01, 2007 11:15 am Post subject: Posted: Thu Feb 01, 2007 11:15 am Post subject: |
 |
|
cold cathodes are unbreakable in what sense? In that they don't really burn out for a long time or that they can't be physically broken?
They definately can be physically broken... they're only about 3mm wide usually and are made of glass. They are fairly easy to break. However, depending on where you get them, they can be encased in a plastic tube that makes it much harder to break.
If you do break one... watch out... they contain mercury (and you're technically not supposed to dispose of them in the normal trash).
However, if you have the means to use them, they do work well. The arcade pads use them (two per panel). At $6per, they do add up... you're looking at $24 for single bulb per panel and $48 for double per panel like the arcade pads. This is why I did not decide on them for lighting my pads... I had the means to buy them, but not everyone that would be following my design would.
_________________
|
|
| Back to top |
|
 |
devout
Trick Member

Joined: 15 Dec 2006
Location: the atl |
5664.  Posted: Thu Feb 01, 2007 4:24 pm Post subject: Posted: Thu Feb 01, 2007 4:24 pm Post subject: |
 |
|
| riptide wrote: | cold cathodes are unbreakable in what sense? In that they don't really burn out for a long time or that they can't be physically broken?
|
Yeah, Im talking about the ones encased in plastic tubes. And it was pretty much a baseless claim, but from what I've seen I cant imagine them breaking from even the most uhh...enthusiastic... ddr-ing. And yes, they are really really easy to break if you take them out of the protective casing, so don't do that! I didnt know about the mercury though... that would explain this rash...
I have no idea how much burn time you get out of them, but again I would guess it's sufficient that you'll stop likeing ddr before they die. Can anyone comment on how long incandescent bulbs last?
My main beef with incandescent bulbs is that they give such a yellow light, which I think makes your arrows look old and faded. Thats just me though. And I dont like LEDs because as you noted they're pretty directional... hard to evenly light a space with them.
ps the $6 price gets you two 12" bulbs, however they only come on leads that are about 8" long, and you cant increase that length, so it would be tricky to use this to light two separate arrows. So yeah, $24 to light an entire pad (8 bulbs) Also, 12" is pretty big, so if you didnt plan for these from the start you probably wont be able to add them later. (They make 4" ones too, but in fewer colors)
pps, they also sell sound reactive cold cathodes, which could be cool for anyone looking to light a cabinet such that it flashes along with the music. I've never tried these myself. |
|
| Back to top |
|
 |
pinkdeath
Basic Member

Joined: 07 Jan 2007
|
5665.  Posted: Thu Feb 01, 2007 8:40 pm Post subject: Posted: Thu Feb 01, 2007 8:40 pm Post subject: |
 |
|
actually, i was planning on placing them below the base level on the base of the pad... using a router tool and routing down about half of the base in that given spot. In this fashioning, I would also cut up the hardboard panels. They both total 3/8 combined hight and i could cut about 4/8 out of the base and still feel safe. So thats nearly an inch of space for any lighting. and if i needed to, i could use spare wood to make platforms as to where the panel would make contact. i was actually thinking of cutting out like 10 sq inches from the middle and putting four contacts in the corners and another in the middle, all connected by wire of course. so that would leave a lot of space open for lighting, right?
i heard cathodes didn't have a very long lifespan actually. but i guess that's wrong. I was actually already looking in to super bright LEDs and a reflector but your ideas definitely help |
|
| Back to top |
|
 |
riptide
Trick Member

Joined: 14 Aug 2002
|
5666.  Posted: Fri Feb 02, 2007 6:12 am Post subject: Posted: Fri Feb 02, 2007 6:12 am Post subject: |
 |
|
Incandescents usually last about 1000 hrs (constant on time -- flashing decreases it I think).
Cold cathodes generally last about 10,000 iirc. They also consume much less energy, but for such a temporary on/off use, I'm not sure how much it'd make a difference on the power bill
however replacing your standard light bulbs with CFLs(similar, but the glass tubes are a bit larger and are designed for better cost effectiveness/power usage) definately help the power bill -- standard incandescents release a lot of their energy in heat... CFLs don't as much, so you can have a 15W light produce the light of a 60W incandescent with less power.
I also agree with devout about using regular paper. I tried exactly what your father recommended -- a transparency with print on it, but you just don't get the diffusion you will need... you'll basically see the lights themselves. Paper diffuses the light enough that you'll get a fairly even looking lighting on the surface despite it not quite being even inside. Assuming it's spread some already which is what the reflector does.
I did quite a few light experiments finding that worked best in that area. I just never really read enough about electronics to keep diff power levels on two different circuits while triggering both with a single switch... simple stuff, but it was new to me. Marcan posted the electronics to do it in this thread somewhere though.
_________________
|
|
| Back to top |
|
 |
LightningXCE
Trick Member

Joined: 17 Aug 2006
|
5667.  Posted: Fri Feb 02, 2007 1:33 pm Post subject: Posted: Fri Feb 02, 2007 1:33 pm Post subject: |
 |
|
Osh-
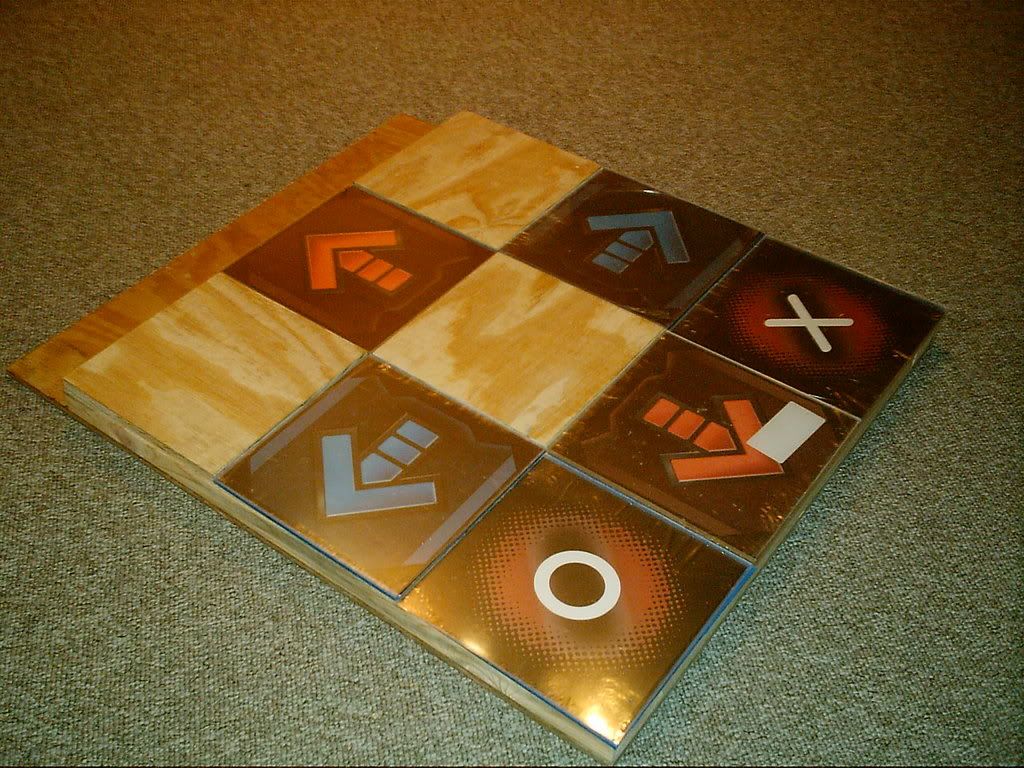
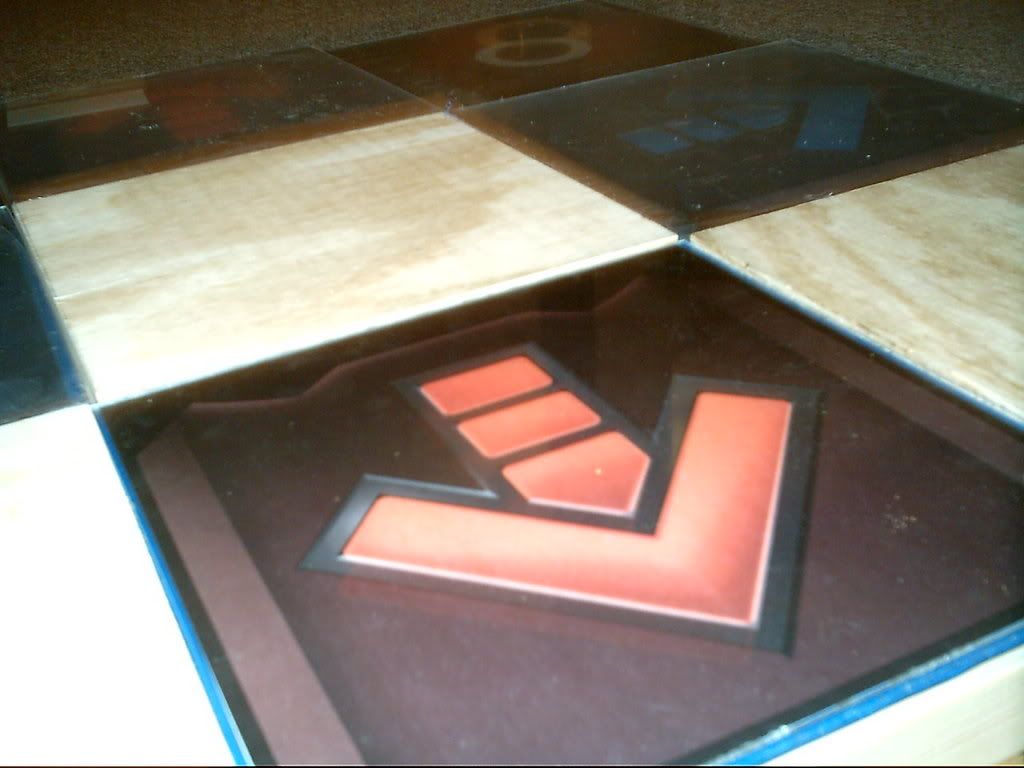
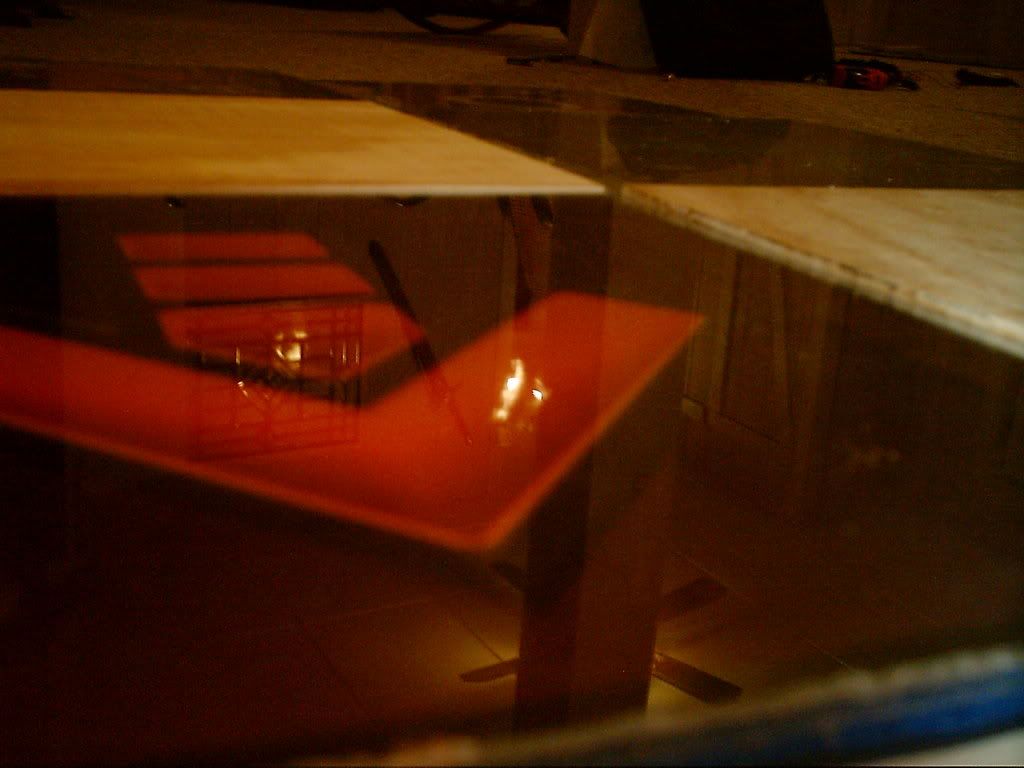
But let's see what's under those arrows now...
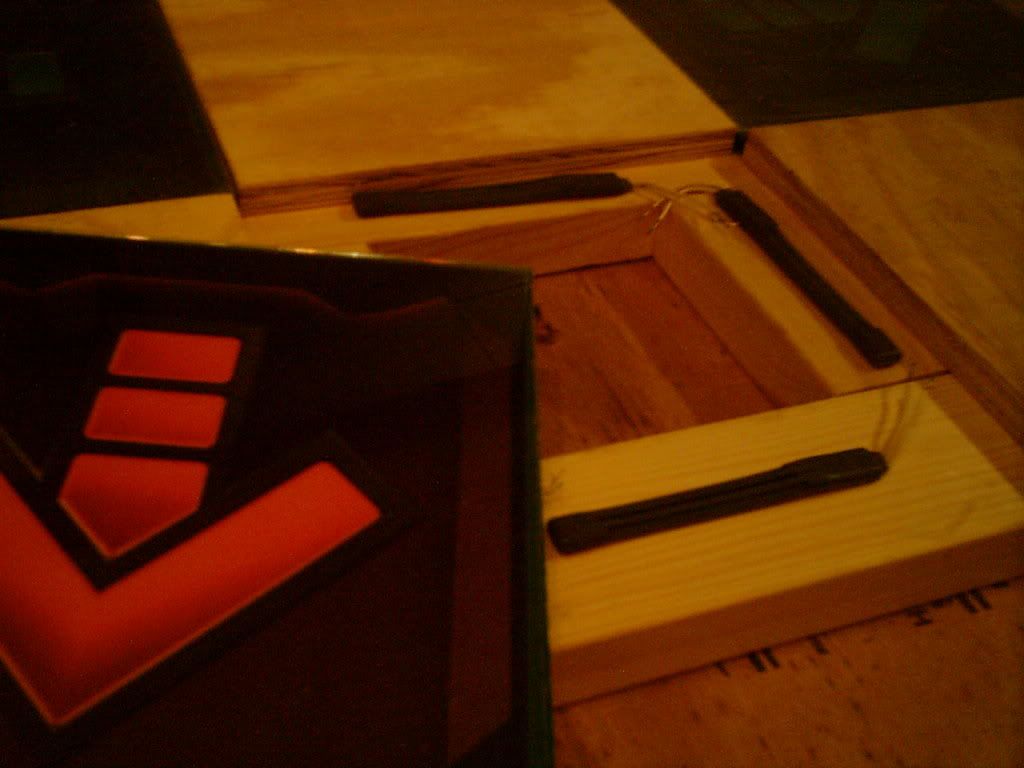
=o!
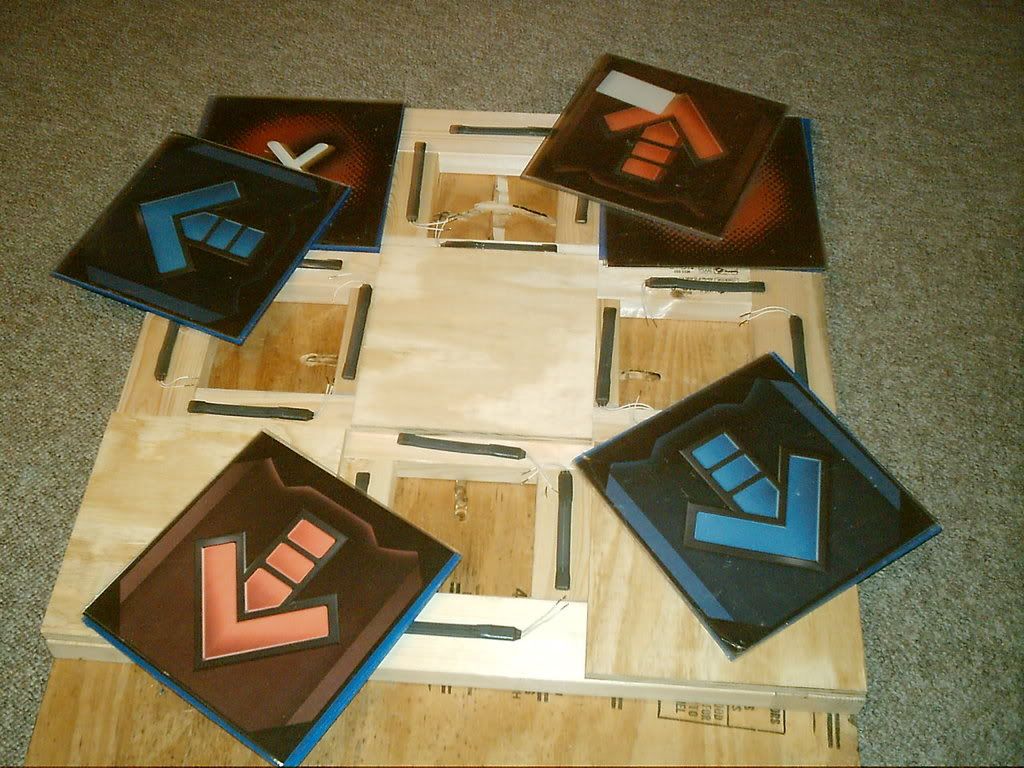
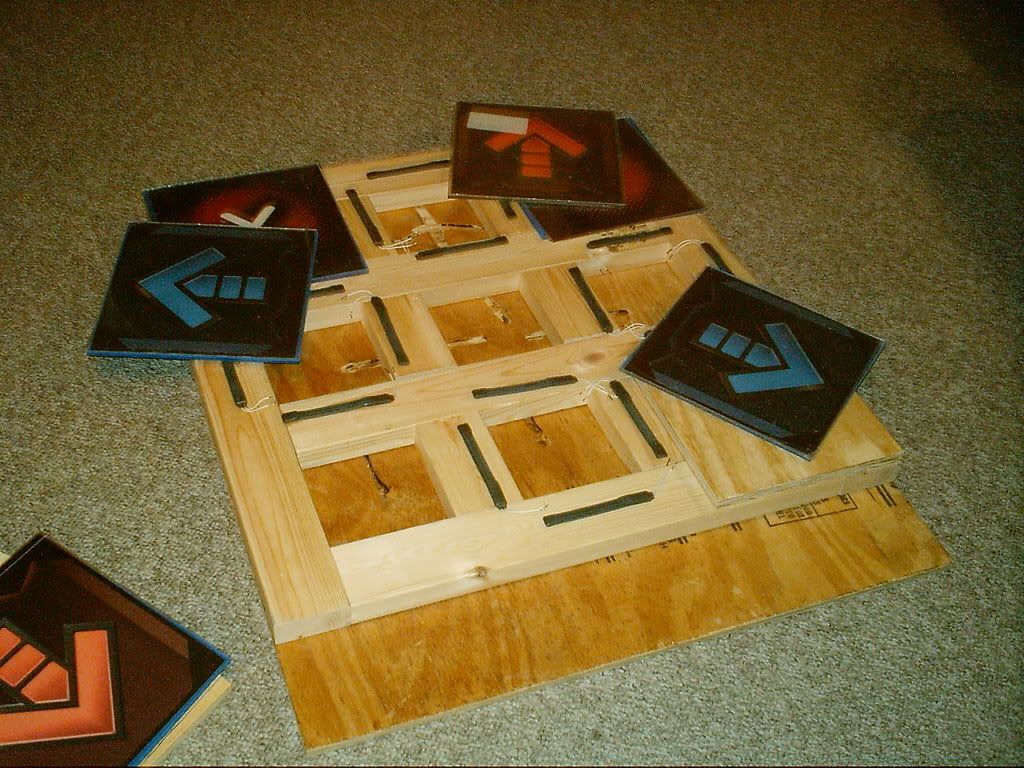
(There's nothing under the X, O buttons yet, those are just going to be done with weather-stripping because of how often they'll be used.
=D
It's a cross between Riptide's design and my own. I'm going to have a lighting setup going here as well.
That extra space on the pack is for a 2x6, which will have a nice rail on it. I'll post pictures once it's completed.
(Also, it's obvious, that's not how the sensors are going to be once done, I still have to get corner brackets, metal, trim, and cover those other panels. Gotta wire those up sensors up too =x)
_________________
=o! |
|
| Back to top |
|
 |
riptide
Trick Member

Joined: 14 Aug 2002
|
5668.  Posted: Fri Feb 02, 2007 1:53 pm Post subject: Posted: Fri Feb 02, 2007 1:53 pm Post subject: |
 |
|
Impressive -- have you poked at the sensors yet to see how they work? If it were me, I'd probably order an extra one just to cut open 

_________________
|
|
| Back to top |
|
 |
LightningXCE
Trick Member

Joined: 17 Aug 2006
|
|
| Back to top |
|
 |
MasterInuYasha
Trick Member


Joined: 09 Nov 2006
Location: Columbus, Montana |
5670.  Posted: Fri Feb 02, 2007 7:51 pm Post subject: Posted: Fri Feb 02, 2007 7:51 pm Post subject: |
 |
|
| riptide wrote: | Impressive -- have you poked at the sensors yet to see how they work? If it were me, I'd probably order an extra one just to cut open 
 |
Thats what I did... I was quite shocked when I saw it was just 2 simple wires |
|
| Back to top |
|
 |
ChilliumBromide
Trick Member


Joined: 16 Jun 2006
Location: Beaverton, OR |
|
| Back to top |
|
 |
riptide
Trick Member

Joined: 14 Aug 2002
|
5672.  Posted: Sat Feb 03, 2007 4:00 am Post subject: Posted: Sat Feb 03, 2007 4:00 am Post subject: |
 |
|
| LightningXCE wrote: | | Also, beding metal to cover the solid panels is a royal pain, any suggesions on making it easier, and how to secure it to the plywood/2x4's? |
You're talking about creating those L brackets, right? You're going to need to bolt them inside the arrow wells, so you'll need holes cut in them. Go ahead and cut/drill/dremel your holes into them, bolt them to your plywood/2x4's so that the height is right for the bend you want and then bend it around the wood.
Or... if you have a bunch of clamps, you can clamp them down to the wood and bend them. I was surprised to read that much of working with sheet metal is working with wood first to get an angle, groove, or curve you want and then hammering your sheetmetal onto it... basically the same method we use on the pads. I thought there'd be more to it (did some reading on a fabrication website focused on building/moding computer cases).
_________________
|
|
| Back to top |
|
 |
devout
Trick Member

Joined: 15 Dec 2006
Location: the atl |
5673.  Posted: Sat Feb 03, 2007 7:58 am Post subject: Posted: Sat Feb 03, 2007 7:58 am Post subject: |
 |
|
If someone ever does cut open an arcade sensor, post some pics of it. The secret isnt in the wires, its in what they use to make the wires separate when you're not stepping on it.
Anyway, the easiest way to bend the sheet metal around the plywood is to first make all cuts necessary on the sheet metal: cut out .5" squares from each corner, drill holes for the corner brackets and the 4 screws on top. Then
place the metal in position on a plywood square, and take a second plywood square and put that on top of the metal (so its plywood>metal>plywood). Clamp this sandwich together, then use a hammer to tap the metal tabs down over one of the plywood pieces. Dont try to hammer it all the way down with one swing... rather make 5-6 passes along the length of the tab, tapping it down slowly and evenly across its length.
Alternatively, just take your pre-cut metal and plywood to a sheet metal worker, and ask if they can bend it for you on a bench brake. [Note: Im not actually sure if you can use a bench brake to bend sheet metal into a box shape... I could see problems with that.] Assuming they can do it, you might want to secure the metal to plywood first with some double sided masking tape around the edges (not in the center) to save them some trouble. Its a pretty trivial bend and I dont think they'd charge more than a couple bucks to do the whole pad. |
|
| Back to top |
|
 |
pinkdeath
Basic Member

Joined: 07 Jan 2007
|
5674.  Posted: Sat Feb 03, 2007 4:02 pm Post subject: Posted: Sat Feb 03, 2007 4:02 pm Post subject: |
 |
|
Pink's finished DDR pad
 |
|
| Back to top |
|
 |
pinkdeath
Basic Member

Joined: 07 Jan 2007
|
5675.  Posted: Sun Feb 04, 2007 12:32 am Post subject: Posted: Sun Feb 04, 2007 12:32 am Post subject: |
 |
|
| Will a 12" cold cathode light fit in the 11" arrow after/if you cut off the tubing and such? because i'm finding those a lot cheaper |
|
| Back to top |
|
 |
devout
Trick Member

Joined: 15 Dec 2006
Location: the atl |
5676.  Posted: Sun Feb 04, 2007 8:28 am Post subject: Posted: Sun Feb 04, 2007 8:28 am Post subject: |
 |
|
| pinkdeath wrote: | | Will a 12" cold cathode light fit in the 11" arrow after/if you cut off the tubing and such? because i'm finding those a lot cheaper |
the 12"ers are actually 12.625" long by 5/8"*5/8". If you remove the square mounting blocks at the end then it'll be about 12.125" long by .5" diameter. The actually bulb itself is 12" long and cant be shortened.
If you used ddrhomepads design for the plywood/metal frame, and you have that supported on the 1x4s , then your 11" arrow wells shouldnt actually have "walls" and you should be able to slip the ends of a 12" light under the edges of the plywood squares. You'll also need a 1"*3"*.625" volume to put the inverter, somewhere close to the bulbs. I put this under the plywood squares, between the two 1x4 rails. (This volume assumes you take the inverter out of its protective case, which is about 1" thick and wont fit under a 1x4. |
|
| Back to top |
|
 |
traydemark03
Trick Member

Joined: 22 Oct 2006
|
5677.  Posted: Sun Feb 04, 2007 9:32 am Post subject: Posted: Sun Feb 04, 2007 9:32 am Post subject: |
 |
|
| Hey LightningXCE. What are you using to keep your panels together? Or is that just blue tape? |
|
| Back to top |
|
 |
riptide
Trick Member

Joined: 14 Aug 2002
|
5678.  Posted: Sun Feb 04, 2007 12:03 pm Post subject: Posted: Sun Feb 04, 2007 12:03 pm Post subject: |
 |
|
It's funny how the circle that the combined arrow graphics create doesn't look quite perfect because there is a square within it and it's surrounded by squares as well... One of the reasons I chose not to go with the standard arrow graphics.
_________________
|
|
| Back to top |
|
 |
LightningXCE
Trick Member

Joined: 17 Aug 2006
|
5679.  Posted: Sun Feb 04, 2007 2:18 pm Post subject: Posted: Sun Feb 04, 2007 2:18 pm Post subject: |
 |
|
| traydemark03 wrote: | | Hey LightningXCE. What are you using to keep your panels together? Or is that just blue tape? |
They aren't held together. The blue you see is the protective covering on the thick plexi.
My arrows are like most others;
Thin Plexi
Arrow image
Thick Plexi.
_________________
=o! |
|
| Back to top |
|
 |
|


